

5 Min Reading
Add rustic charm to your abode with wood signs for home decor. You can design them any way you choose and make mistakes that add to the old and weathered look. There are rustic signs for home decor available for purchase, but DIY signs for home are more fun.
After learning how to make wooden signs, you can do so on a small budget in a few hours and impress your friends with your antique building skills. You can borrow DIY wood sign ideas from those shown here or build something unique.
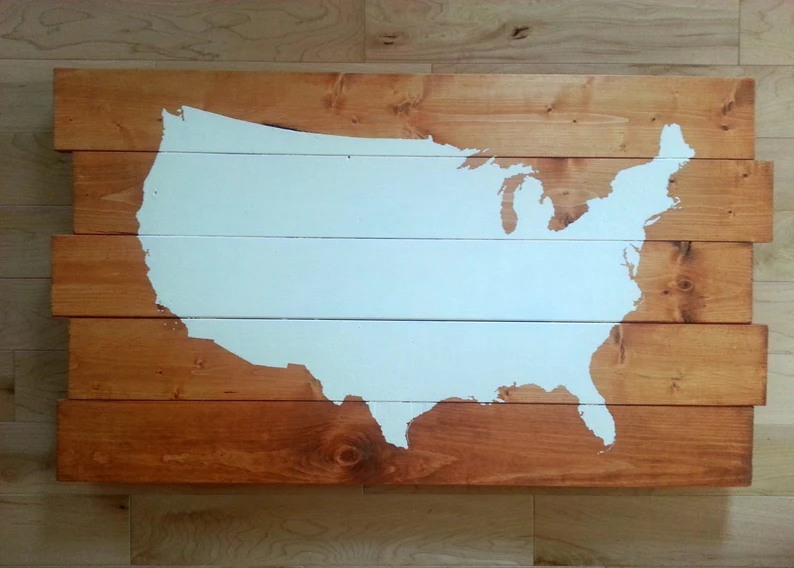
1. U.S. Map on Pallet Board Sign
The supplies needed for this project are
- Pre-made pallet wood sign available from Amazon
- Early American wood stain
- U.S. map stencil
- White craft paint
- Paintbrush
- Red felt
- Hot glue gun
Using a pre-made wood pallet sign saves time and money. It is thinner and lighter than wood from a disassembled pallet and, therefore, cheaper to ship.
- Stain the sign and wipe off any excess. Allow it to dry thoroughly.
- Place the stencil on the pallet sign and use a dry brush technique to apply the white craft paint. Dab around the stencils to ensure the outline of the U.S. is correct.
- Cut 1/2-inch hearts from the red felt and use the hot glue gun to attach them to areas of significance to you.
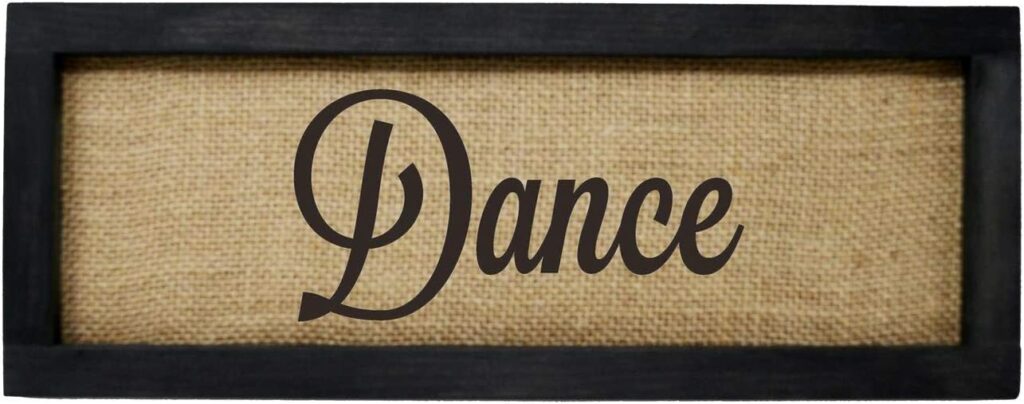
2. Rustic Word Sign
![]()
![]()
![]()
-
- You can not have too much artwork in a home. Using some power tools, you can make DIY wood signs for home. The one shown here features the word ‘Dance’ but can have any word choice for someplace in your house. Materials needed are
- Enough 1/4-inch plywood for the sides and back
- Word stencil
- Wood stain
- Mod podge
- Foam brush
- Burlap
- Wood glue
The tools you will use are
- Measuring tape
- Drill
- Scroll saw
- Circular saw
- Staple or nail gun
- Trace the word on the plywood cut to the size of the picture you prefer
- Drill holes with the letters. Use the largest drill bit possible without drilling into the edges of the stencil.
- Use the scroll saw to cut the edges of the outlines. It is best to use a fine blade to easily get around corners and into the holes.
- With the circular saw, cut the edges of the frame. The edges and the base of the board are the same lengths, with 45-degree angles cut on the ends of the frame pieces. 

- Sand the frame pieces and base.
- Stain the frame and letters in the color of your choice.
- Cut the scrapbook paper to fit the board.
- Using the foam brush, lightly spread the mod podge along the bottom of the base.
- Place the burlap on the top. Spread mod podge on the fabric
- Allow the mod podge to dry before attaching the letters with wood glue.
- Staple or nail the frame in place.
- You can not have too much artwork in a home. Using some power tools, you can make DIY wood signs for home. The one shown here features the word ‘Dance’ but can have any word choice for someplace in your house. Materials needed are
3. Wooden Letter Signs
- For a more antique look, lightly sand the corners and edges with a fine-grit sandpaper. Wipe with a tack cloth when finished.
- Glue or nail the letters to the piece of board.
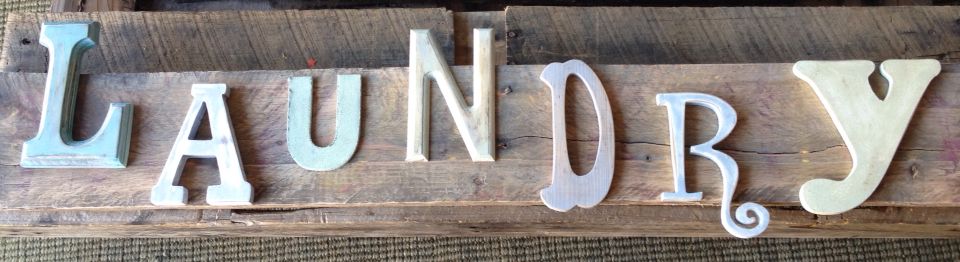
- Amazon has various letter styles and sizes that you can mix to spell any word you like. The sign featured here spells ‘Laundry’ using letters that differ in style and size. They are nailed to a piece of weathered wood. Each is painted differently, and all are a bit distressed to give them a rustic appeal.
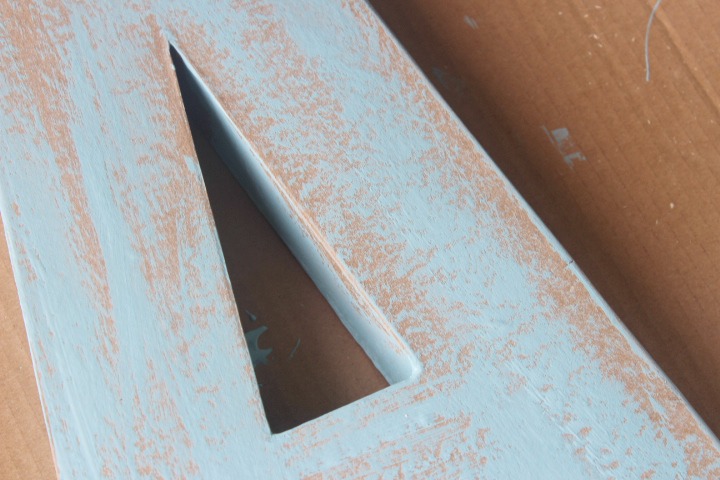
How to Make Wood Signs with a Distressed Look
- Place the letters on a drop cloth and sand them lightly to create a surface that is a bit rough. As you sand, apply different levels of pressure. It causes more paint to be absorbed in some areas. Use a cloth rag or tack cloth to wipe the letters clean.
- With the darkest paint to be used on each letter, apply the first coat. Spread the paint thin to allow the cracks to show through the paint. Let it dry for 24 hours.
- To create a paint wash, mix water one teaspoon at a time with a lighter shade of paint. The wash should be thin but not to the point of bubbling when applied. Use a foam brush to apply the wash to the letters. While wet, use a paper towel to wipe some areas to create an antique look. Allow the second coat to dry for 24 hours.

- For a more antique look, lightly sand the corners and edges with a fine-grit sandpaper. Wipe with a tack cloth when finished.
- Glue or nail the letters to the piece of board.
4. Rustic Farmhouse Chalkboard
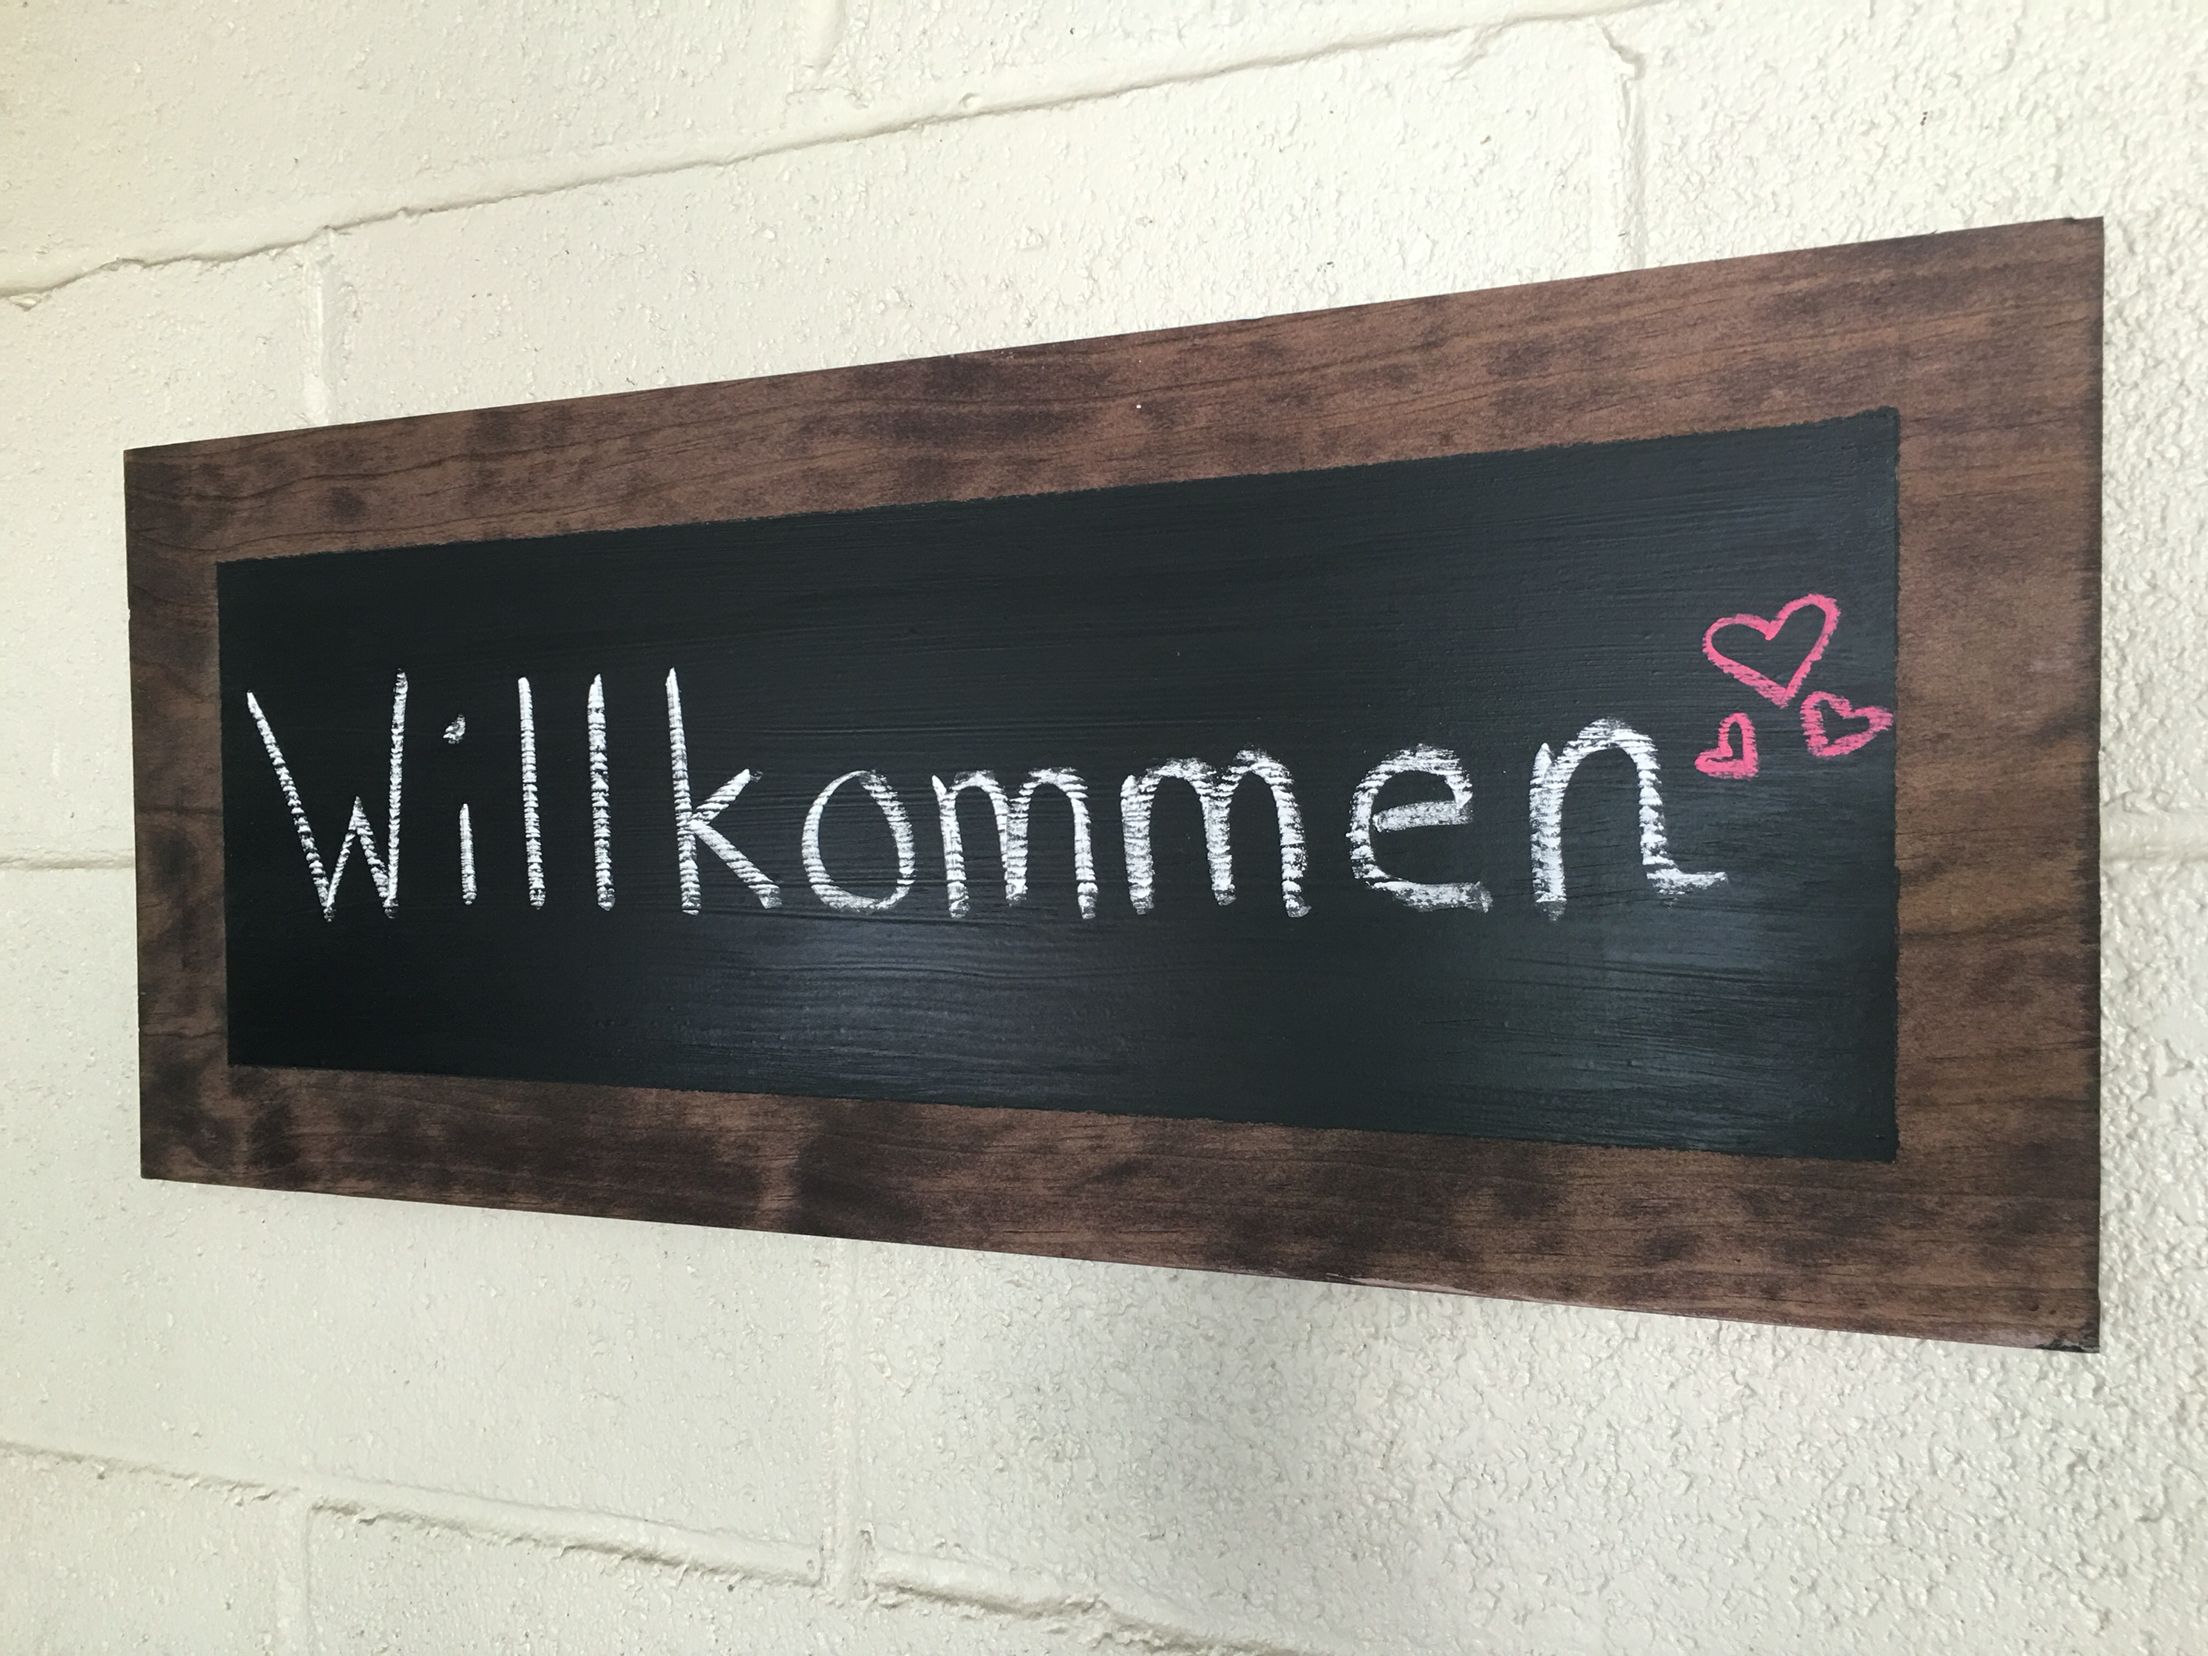
A chalkboard is among excellent DIY wood signs for home. This one is extremely easy to make. No power tools are required. You need
- A wooden board
- Chalkboard paint
- Sandpaper
- Stain
- Sealer
- Painter’s tape
- Hardware for hanging
Step 1: Lightly sand the board and wipe it down with a wet rag
Step 2: Apply two coats of stain with a foam brush or rage.
Step 3: After the stain dries, tape off three-inch sections on the sides of the board.
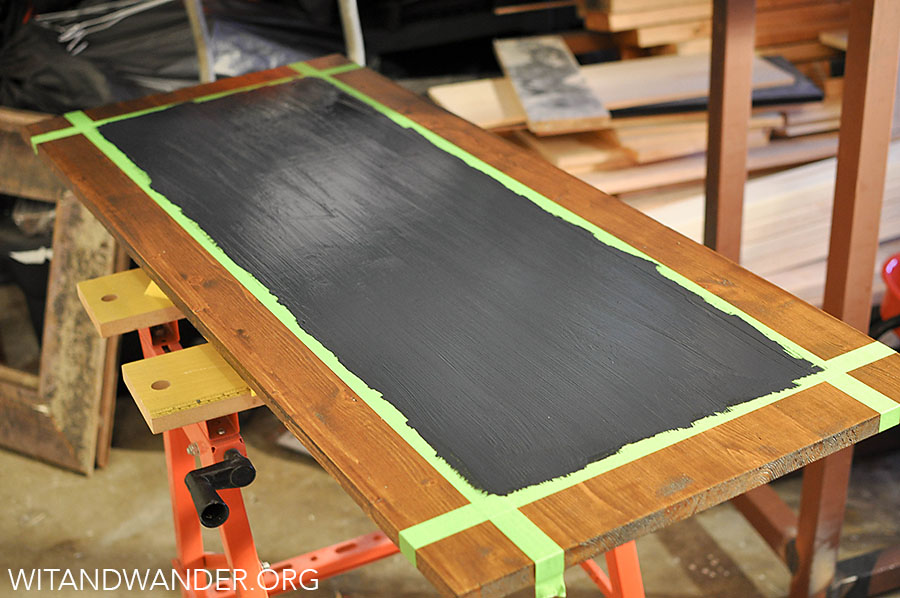
Step 4: Apply the chalkboard paint inside the taped area. Use canned paint, not spray paint. Remove the tape when finished painting the first coat.
Step 5: When the chalkboard paint is dried, repeat Step 4 two more times. Waiting for paint to dry is the part that takes the most time.
Step 6: Add the hardware to hang the sign. Screw eye hooks and several twine loops work well. Sawtooth hooks also are suitable for hanging the sign.
Recap
Whether used outdoors or in the home, learning how to make wooden signs adds a rustic touch to the decor. When you find the right pieces of wood, you sand, wash, and cut them to create DIY wood sign ideas.
Decorate the rustic signs for home or yard with paint, wood stain, letters, or designs. You learn how to make homemade wooden signs with a little effort and time. Pieces of wood are available in craft stores or online from Amazon or Etsy. Spruce, beech, and pine make excellent wooden signs.